Making This Blog
My background as a developer is primarily as a back-end engineer. Front-end is definitely my uncomfortable spot.

My primary objective for the design of this blog is that I could support deploying mini-examples. I wanted to be able to not only serve the static blog content, but also to be able to serve APIs that will power interactive examples. These examples should load quickly.
I started looking for what platforms I could use for creating content. The blogging framework that I’ve seen used the most is Jekyll, and it’s usually hosted on github. This is great for static content, but what about hosting APIs for demonstrations?
Let’s talk about getting this blog running on CloudFront/S3, and the steps needed to integrate Jekyll with APIs.
Picking a Theme
I’m really not a front end developer. I don’t have a good sense of what criteria should be used to design a UI. Although I can point out things that don’t work, but I don’t have any expertise in building a good experience. Through the Jekyll catalogues I went. Minimal Mistakes looked nice. It seemed like it’s actively maintained, and that’s good enough of a starting place. Along with a nice look, it seems well documented, provides guidance on adding CSS, and Javascript. Let’s start iterating.
Automated Testing
I found quickly that Minimal Mistakes isn’t as safe as other Jekyll Themes. Jekyll uses the Liquid
templating language. Out of the box Jekyll does a lot of good validation for making sure links don’t break. Unfortunately,
these validations assume some properties of your hosting platform. On Github Pages, URL paths ending in “/” will load the
content at index.html under that path. This is not true by default for S3. In addition to the quirks of the hosting
platform, Minimal Mistakes offers some custom Liquid functions that don’t perform path validation. Given these issues,
it seems like at a minimum my automated tests should perform these validations. Additionally, these tests need to be
performed against a hosted instance of the blog to capture the behavior quirks of the hosting platform.
A simple CodeBuild integration test will do. For my blog I chose to write my tests in Typescript using Mocha and Chai. Getting these running is straightforward using their respective documentation. Adding in a buildspec will allow these tests to be ran in CodeBuild.
version: 0.2
phases:
  install:
    runtime-versions:
      nodejs: 12
    commands:
      - npm install
  build:
    commands:
        - echo "******** Building Blog Integration tests ********",
        - npm run build
        - npm test
reports:
  IntegrationTests:
    files:
      - '**/*'
    base-directory: 'build/integ/'
Additionally, I’ll want to make sure my blog keeps having good performance. It should load efficiently, and follow some set of best practices. Google’s Lighthouse offers a NodeJS module for doing just that. My tests are setup to run accessibility, best-practices, performance, and seo test categories. In a second round of tests I perform an additional performance test run with a higher threshold to verify hot cache performance. My buildspec exports these reports as an artifact.
artifacts:
  files:
    - '**/*'
  base-directory: 'build/lighthouse'
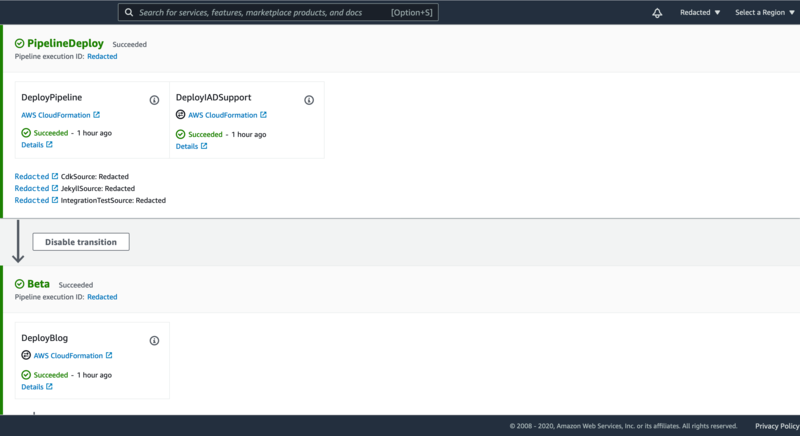
Setting up a pipeline
My CodePipeline tracks my three packages, CDK, integration tests, and the Jekyll content. In addition to the CDK stack definitions, the CDK package will temporarily host the code for custom resources, and blog APIs. This pipeline is self-mutating. Changes that I need to make to the pipeline can be deployed by itself. This is very useful for adding additional deployments in the beta, and production stages. The change to move from a manual approval to integration test approval was able to modify the pipeline, and then automatically trigger another deployment to deploy using the new integration test steps.
There can be some sharp edges with self mutating pipelines. As with all pipelines, stages that depend on the results of later stages, require that creating the dependency after the later stage has been deployed. In my own pipeline, I was caught off guard by this mistake by adding a dependency on an environment variable in the Jekyll buildspec. The pipeline sets this environment variable, and this dependency blocked the pipeline from being able to update itself. One way to reduce the number of these conflicts is to move most dependencies to after the mutation stage. In my case, I considered breaking the build stage into a pipeline build, and jekyll build stage. Moving the jekyll build stage to occur after the pipeline mutation would have prevented my accidental introduction of an inverted dependency between the build and mutation stages. In my case I opted to keep the inverted depedency so that my builds could continue to run concurrently.
Comments
Leave a Comment